How to setup tax rules in Magento 2?
Electronic commerce can be referred to as the revolutionary development in the history of humanity that transformed the scenario of production, manufacturing, supply chain management and entrepreneurship too!
The industry today stands at a whopping $3.53 trillion, which is around 14.1% of the global retail sales. The industry has led to a surge in the number of jobs, introduced cutting edge technology, increased the number of internet users and much more!
For many years, this sector didn’t come under the taxation system, but later the government found it necessary to tax it.
What are taxes in eCommerce?
Tax on eCommerce varies from nation to nation. If you are an online retailer and responsible for sales tax in a state, then you have to charge your buyers the sales tax and remit the taxes collected back to the country.
Magento 2: Working with a tax
Magento has the best features and management functionalities that you don’t require any other tool for managing the taxes. The in-built features will allow the store admin to set up the tax system smoothly and manage them more orderly.
The platform also allows for developing personalized or versatile tax rules and conditions based on different tax rates levied by various states and countries.
The tax rules in Magento depend on three factors –
- Product class of purchase item
- Customer class of the person making a purchase
- Tax rates
Based on the location of the customer and above three factors, Magento will automatically calculate the final tax rate.
Creating a tax rule in Magento
-
Step 1
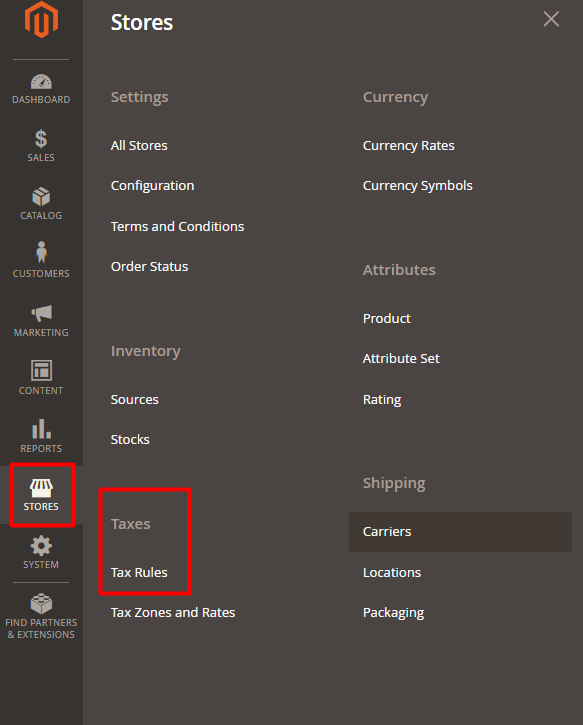
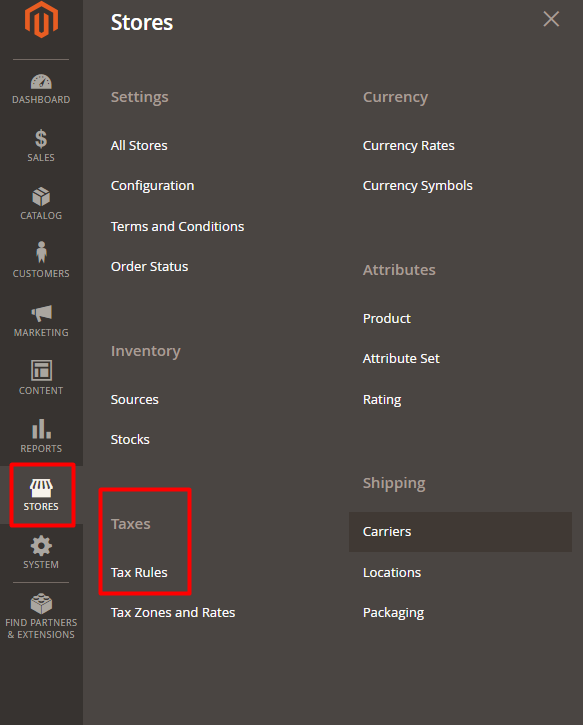
First log in to the admin panel. Click on the “Stores” option and under the drop-down menu, click on Tax rules.
-
Step 2
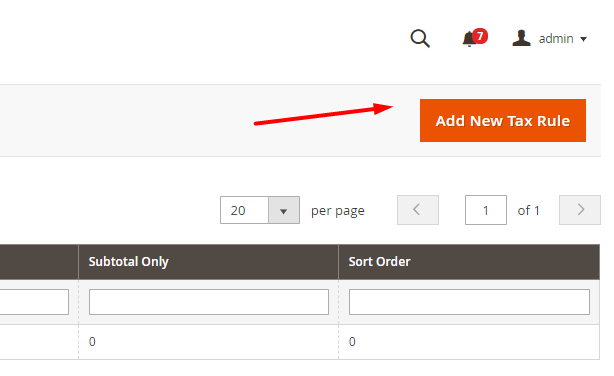
You will see another option – “Add New Tax Rule”. Click on this button.
-
Step 3
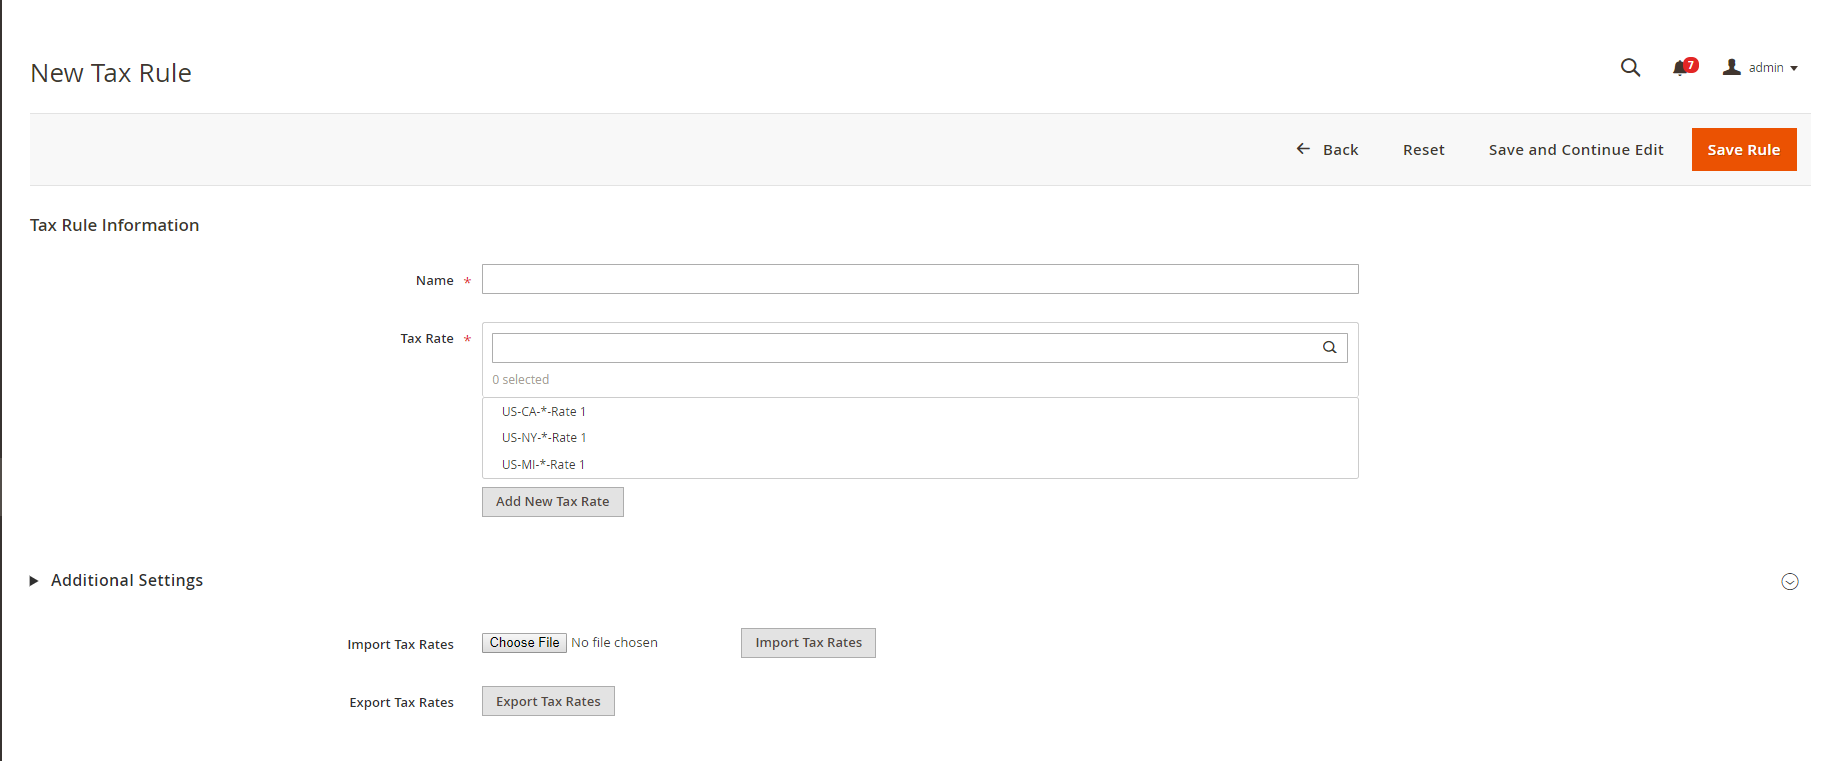
Now move ahead to complete the Tax Rule Information
- Type the name of the tax rule
- Add the TAX RATE to be applied. If you are not sure of the rates, you can select it from the drop down list of existing rates.
- Click on the Add New Tax Rate button.
You can also click on the “Edit” button to configure further.


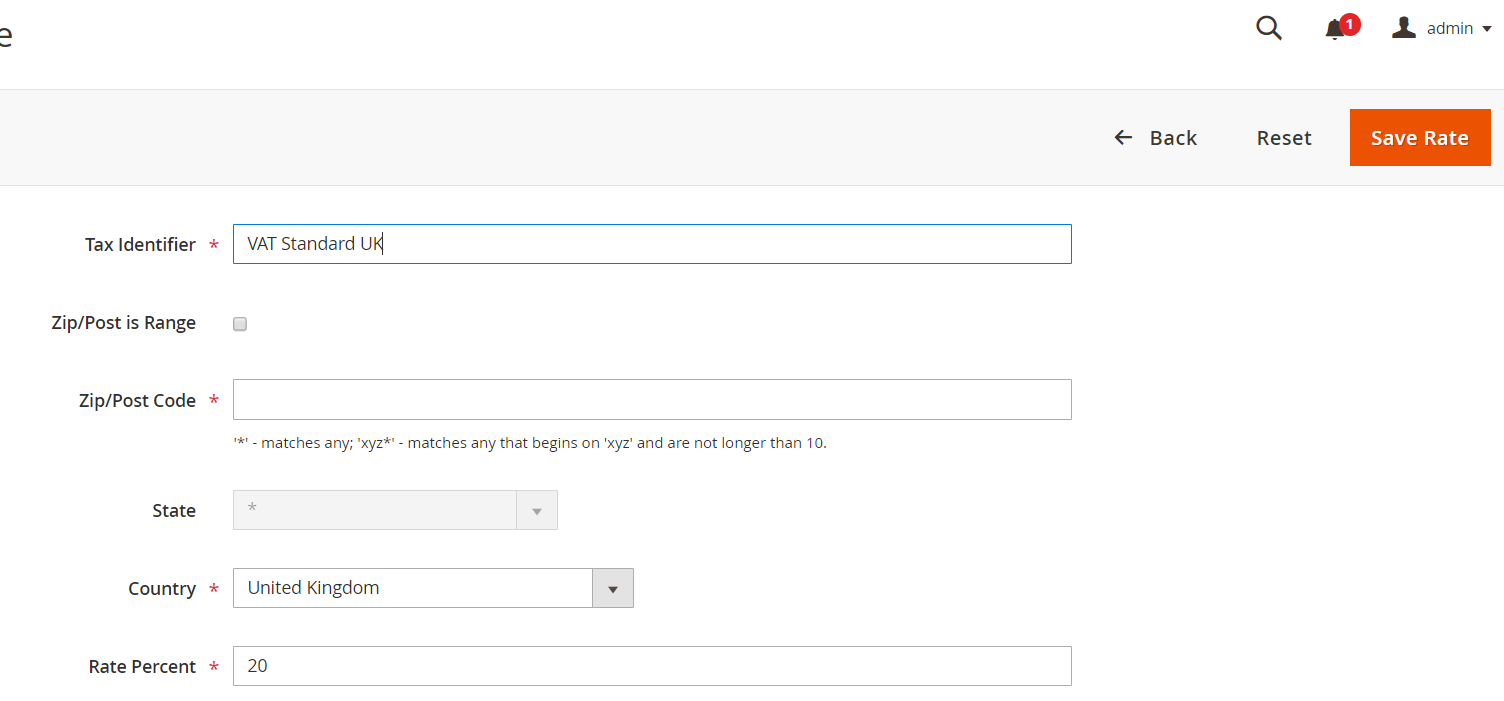
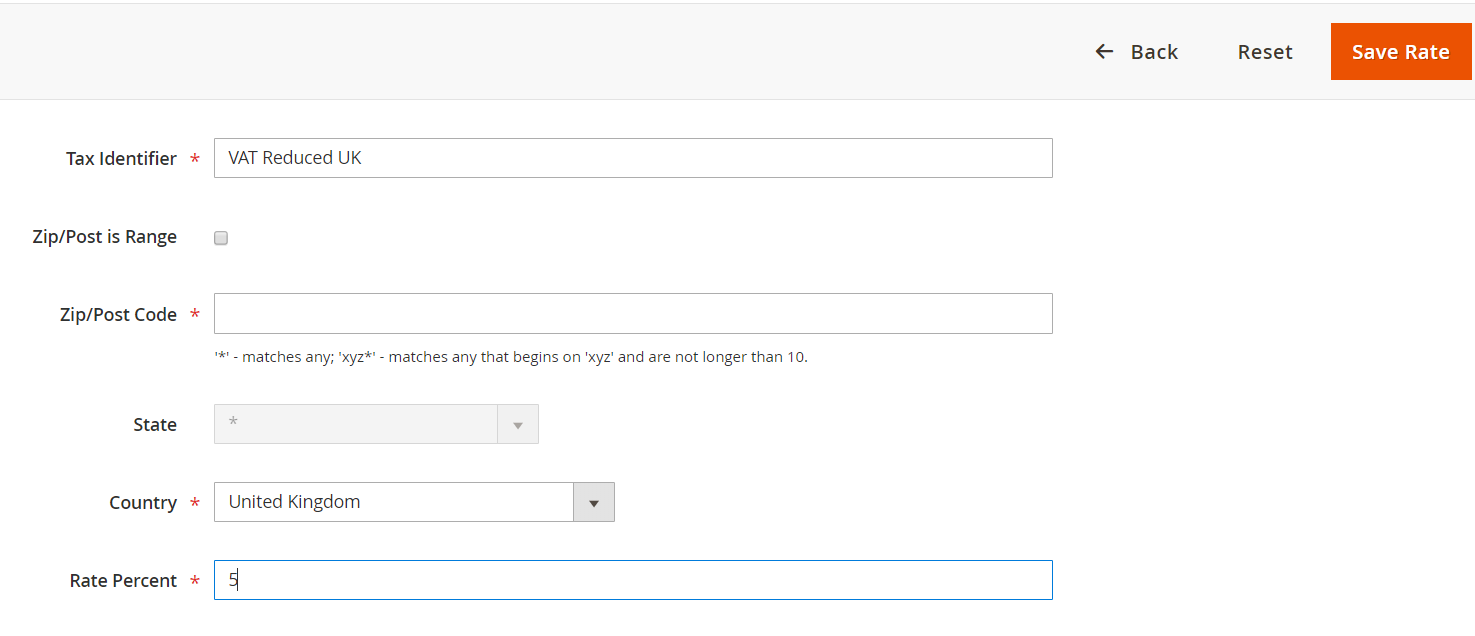
- The Tax identifier field allows you to name the tax rule so that you can distinguish from various tax rates of countries and regions.
- Now fill the Zip/Post code according to the regions where the tax rule applies.
- Select Country, State and Rate Percent.
- Click on the Save button.
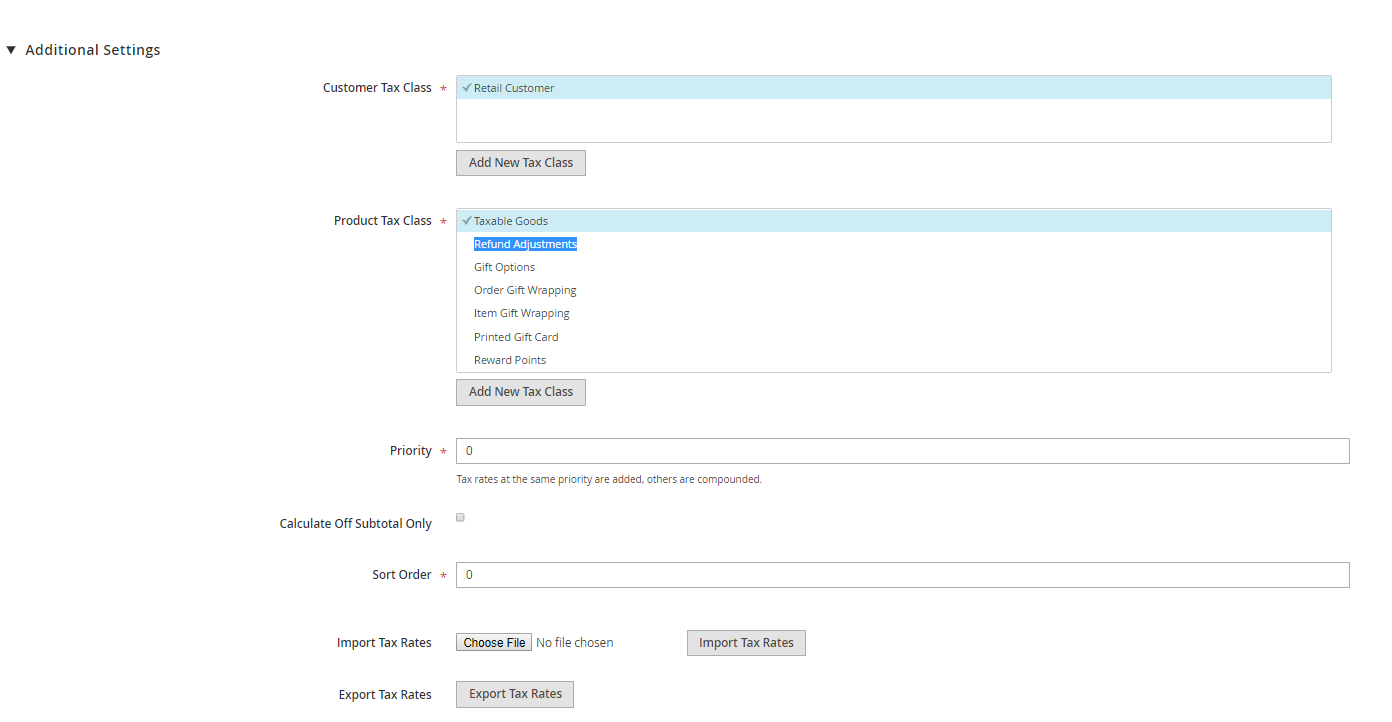
You can also make further changes in the “Additional Settings” option.
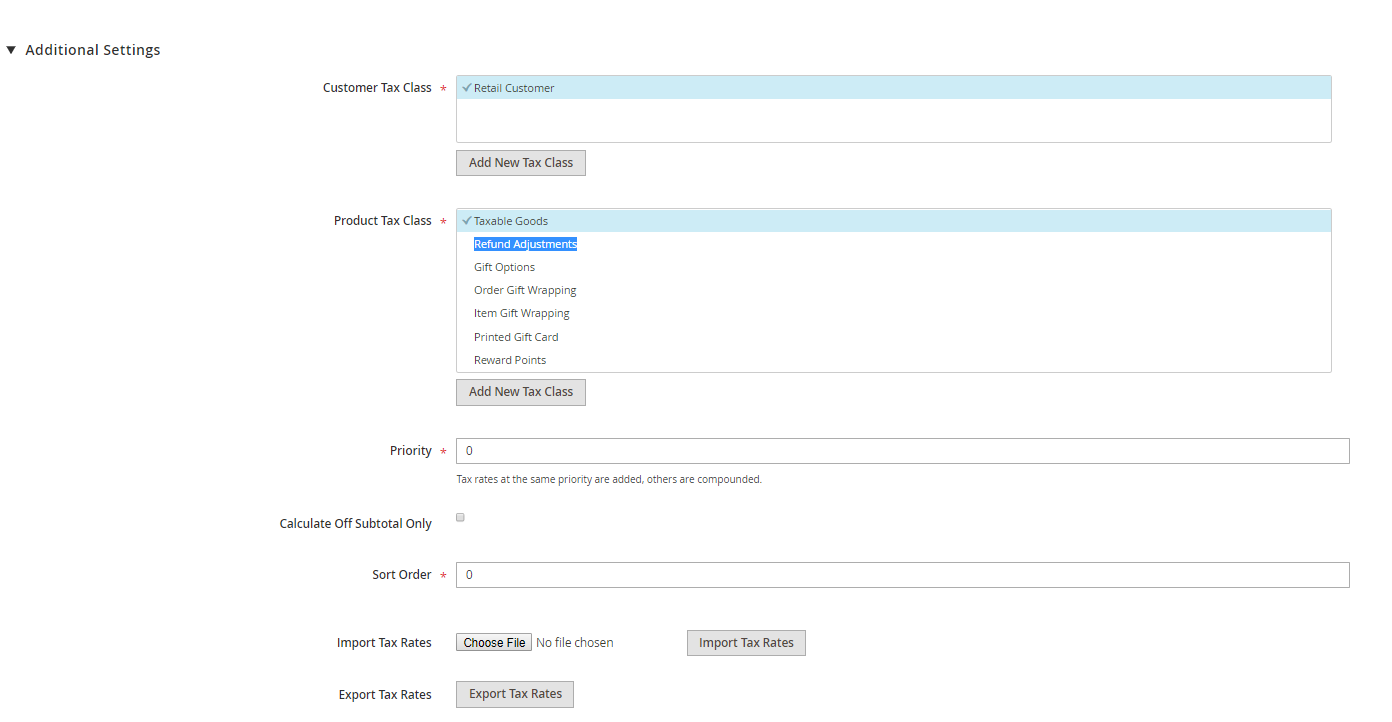
- You can create a new Customer Tax Class, edit them or even select from the existing ones.
- Even under the Product Tax Class, you can create a new one, edit or choose from the existing ones.
- If more than one tax applies, you can decide the priority also. Taxes having the same priority will be summed up while those having varied priorities will be compounded.
- Mark the “Calculate Off Subtotal Only” checkbox to base taxes on the order subtotal.
- You can also sort the order of tax rules.
Apart from the above options, you can also import and export the tax rates in CSV format.
What are tax classes in Magento?
To manage the whole taxation process, Magento asks for further product and customer information like which product is ordered, mode of delivery, etc. Since every country has their own taxation rules under which some items are exempted and others have varying tax rates, Magento follows a uniform rule by categorising under classes.
You can assign certain tax classes to customers, products, and shipping and then further segregate them into categories and classes.
Configuring Tax Classes in Magento
-
Step 1
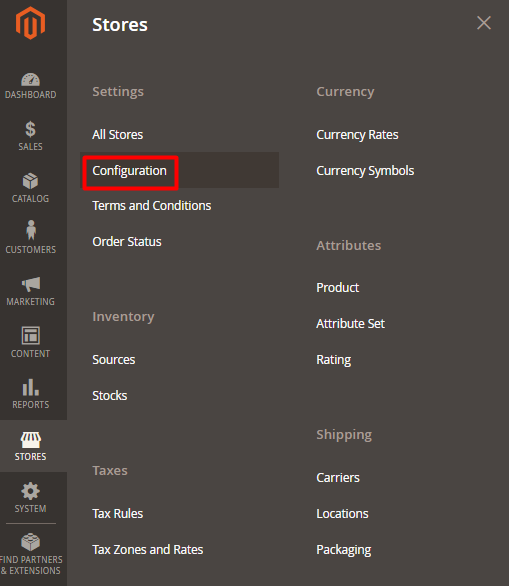
Click on the Stores option and from the drop down menu, click on Configuration.
-
Step 2
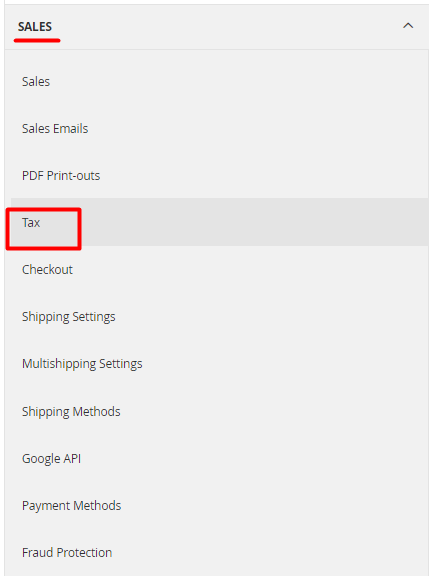
Under the Sales section, click on Tax.
-
Step 3
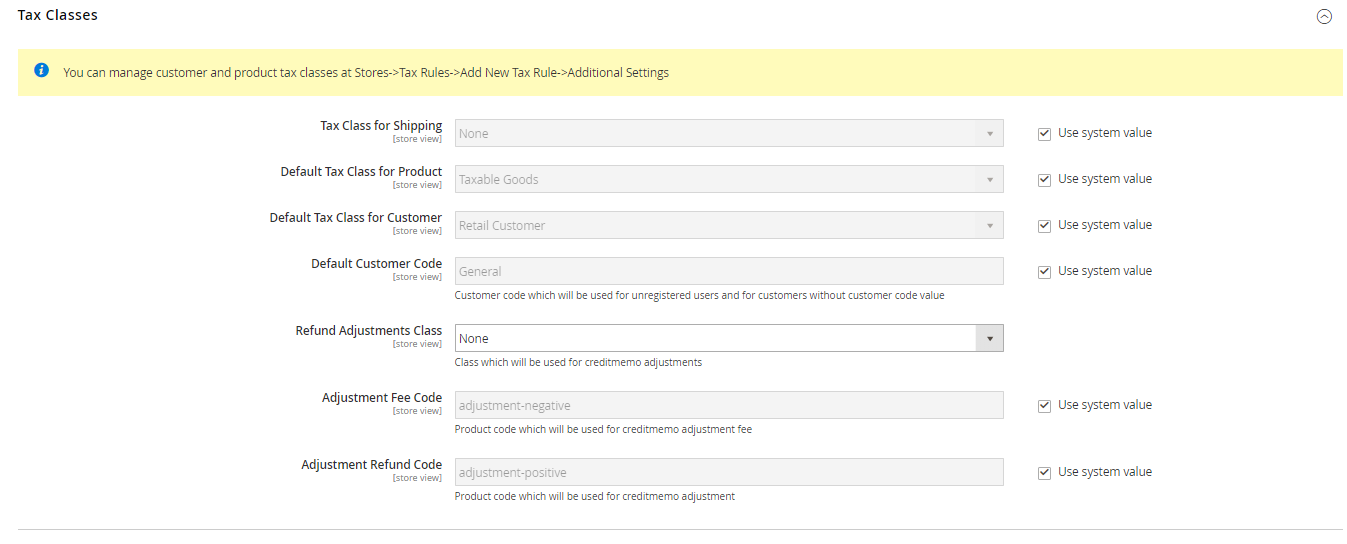
Expand the Tax Classes section
-
Step 4
Now you have to set up the following fields –
- Tax class for Shipping
- Default Tax Class for Product
- Default Tax Class for Customer
-
Step 5
Click on Save Configuration when you are done with the final changes.
How to add new tax classes in Magento 2?
-
Step 1
Click on “Stores” option and move ahead to “Tax Rules”
-
Step 2
Click on “Add New Tax Rule”
-
Step 3
Click on the Additional Settings and then press on Add New Tax Class.
-
Step 4
Enter the new class name in the field.

-
Step 5
Press Add New Tax Class

Adding default tax destination in Magento 2
-
Step 1
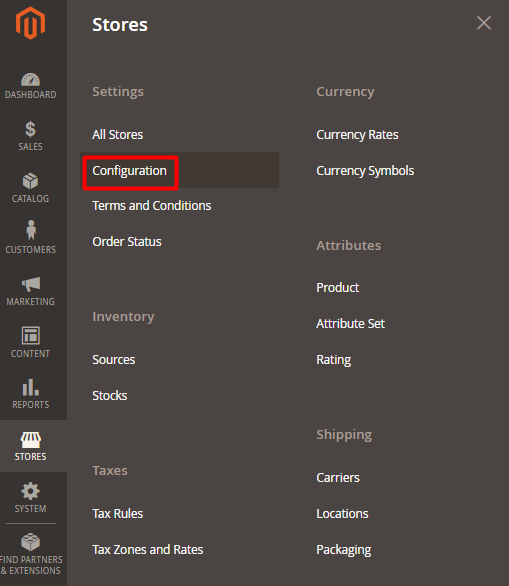
Click on Stores option and then head towards Configuration.
-
Step 2
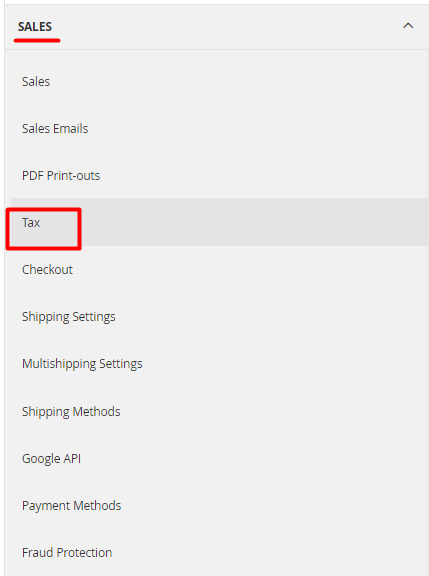
Expand the Sales section and click on Tax.
-
Step 3
Expand the Default Tax Destination Calculation and set some of the most important parameters like default country, default state, and default post code.

-
Step 4
Now click on Save Configuration when you are done with the changes.
What are fixed product taxes in Magento?
There are various items on which the governments of many nations don’t levy any taxes. It varies from nations to nations. You can fix the tax rates in Magento! We recommend to show the tax rates on the product page itself, so as to notify the customers.
Enabling fixed product tax in Magento 2
-
Step 1
Click on the “Stores” option and head towards “Configurations”.
-
Step 2
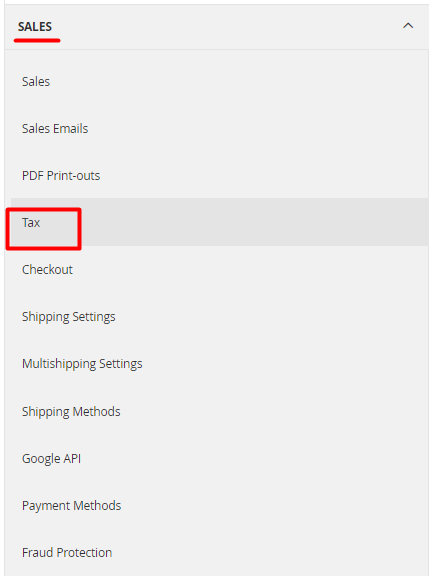
Expand the Sales tab and Press Tax.
-
Step 3
Click on “Fixed Product Taxes” and expand the option.

-
Step 4
Set Enable FTP at Yes.
-
Step 5
Press Save Configuration when you are done with the final changes.

How to create an FTP attribute
-
Step 1
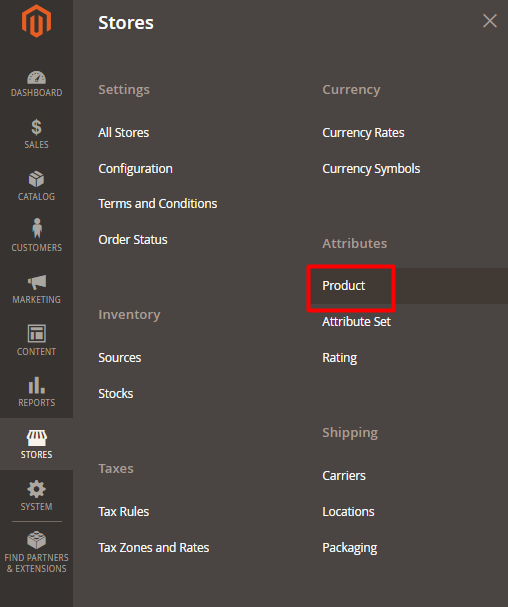
Go to Stores option and further click on Product option.
-
Step 2
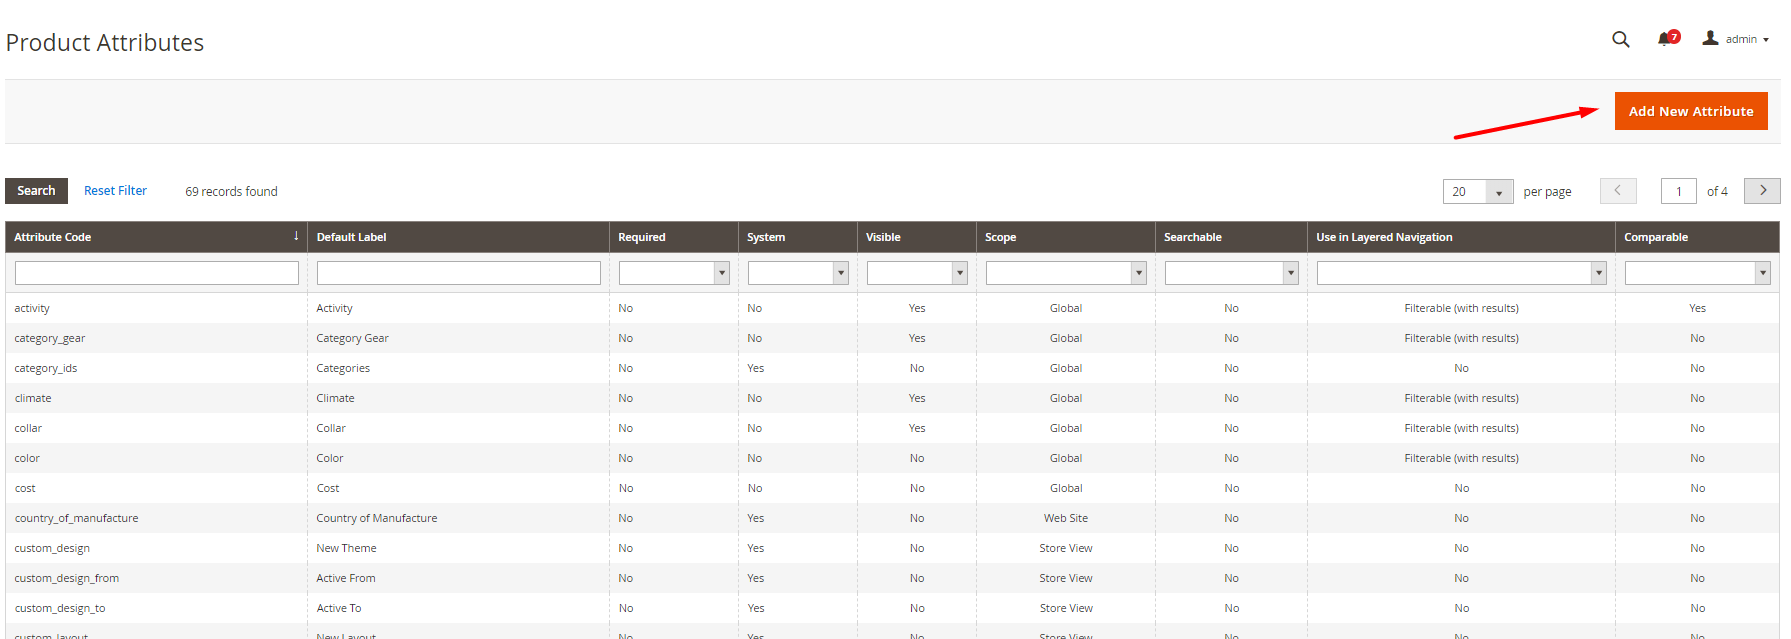
Click on “Add New Attribute”
-
Step 3
Click on “Attribute Properties”

-
Step 4
Expand the “Advanced Attribute Properties”.

-
Step 5
Press the Save Attribute.
How to setup VAT in Magento 2?
-
Step 1 – Validate your VAT number
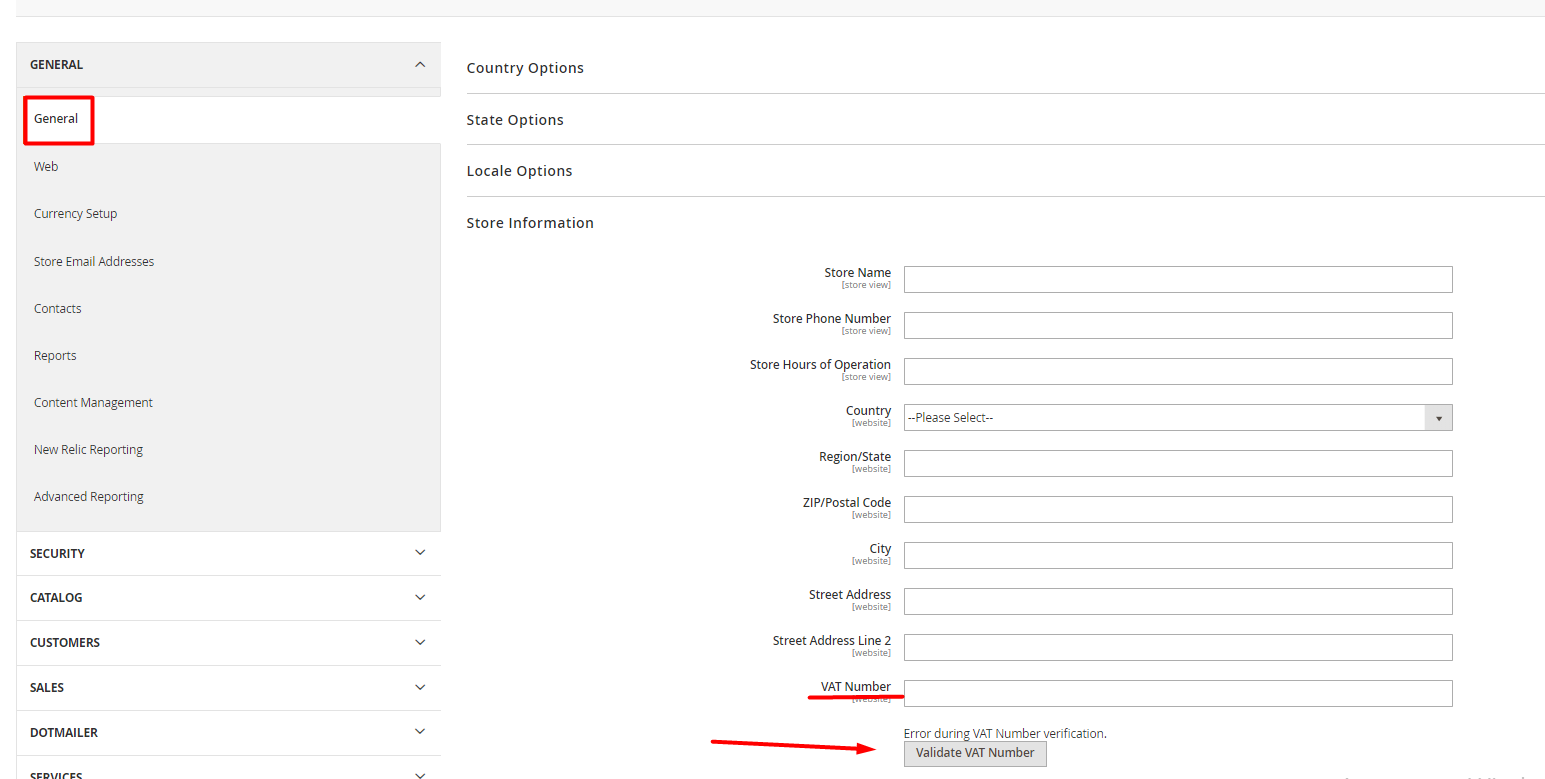
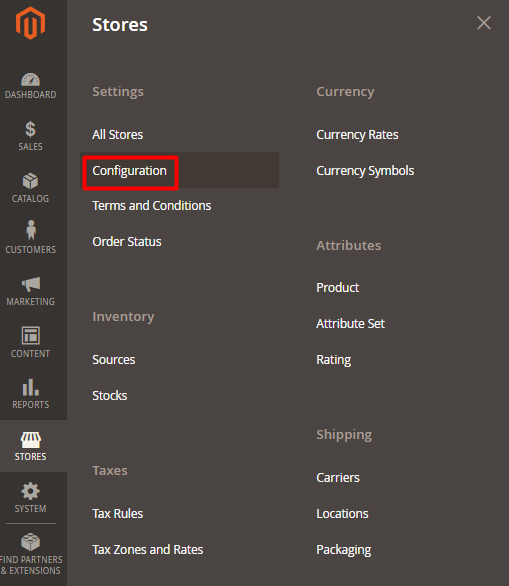
Now log in to the admin panel and head towards the “configuration” option under the “Stores” option.
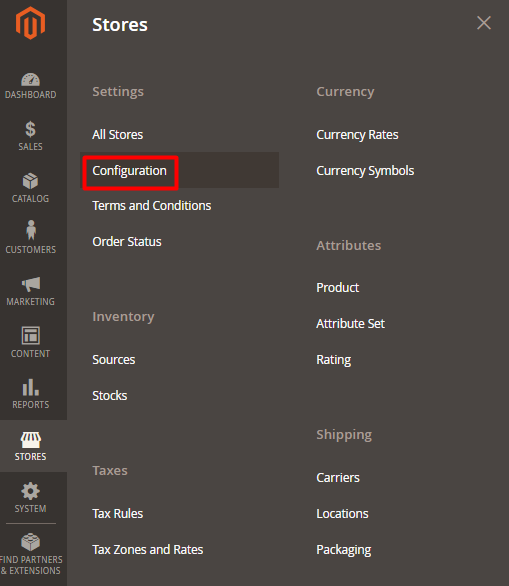
Under the “General” tab, select “General” and click on “Store Information”.

Now enter the VAT number and validate it by pressing the button below.
-
Step 2
Now you have to validate the customer information.
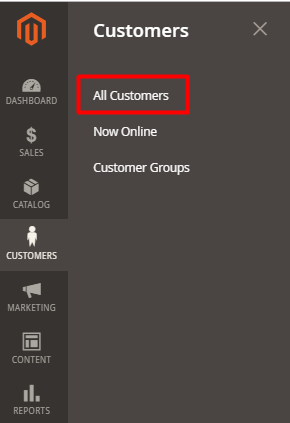
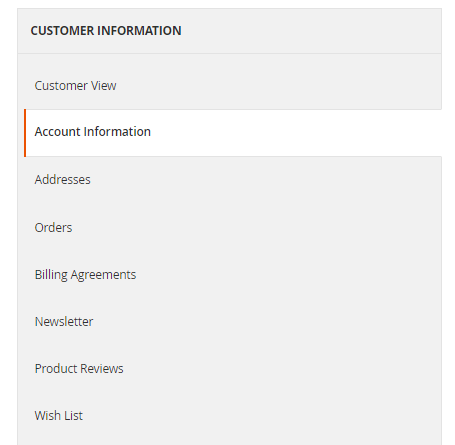
Press Edit if you want to add another VAT number. Now, open the Account Information Tab.
Now you have to enter the VAT number.
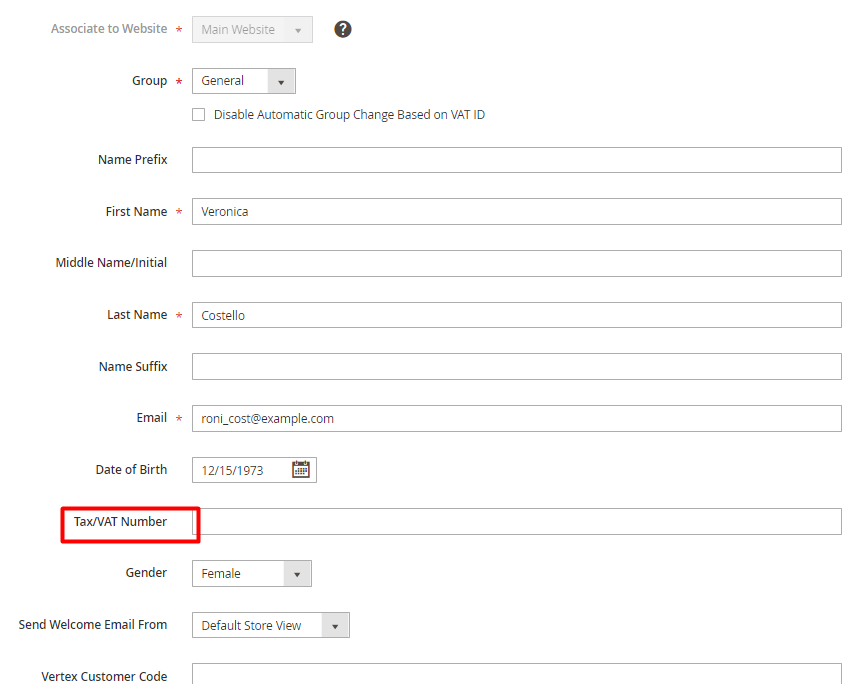
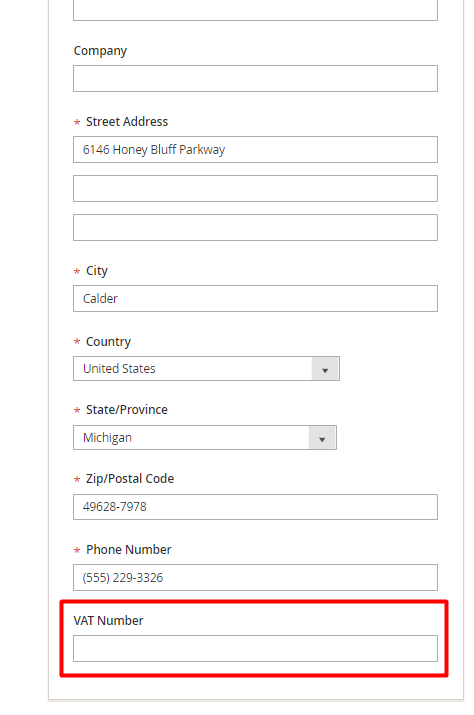
Press Save Customer
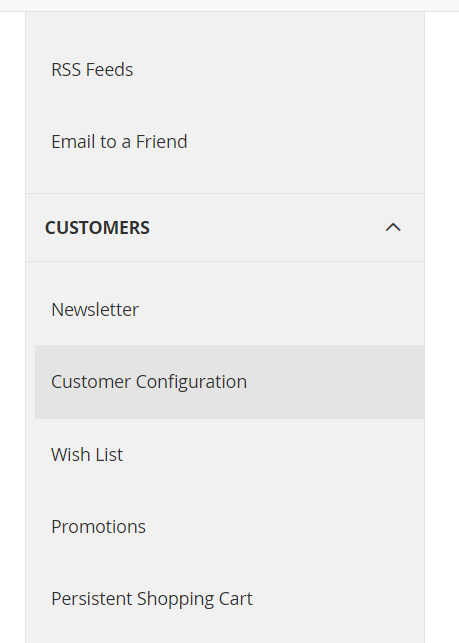
Now select the Customer Configuration
Now you have to click on the “New Account Options” and enable the “Default Value for Disable Automatic Group Changes Based on VAT ID” and “Show VAT Number on Storefront” option.

Press Save Configuration.
-
Step 3
The next step is to set up the tax zones
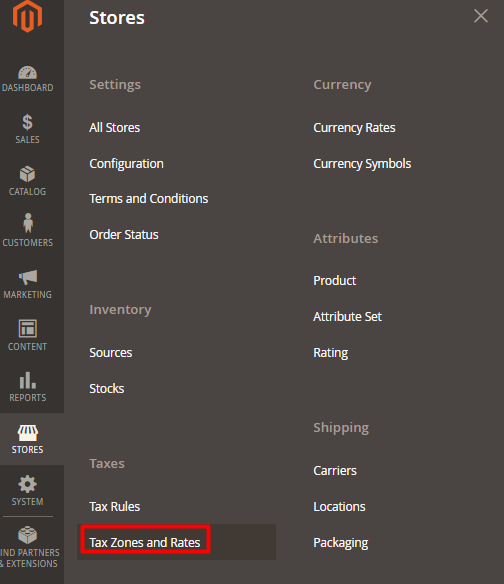
Click on “Add new Tax Rate”

-
Step 5
Time to set up the tax rules.
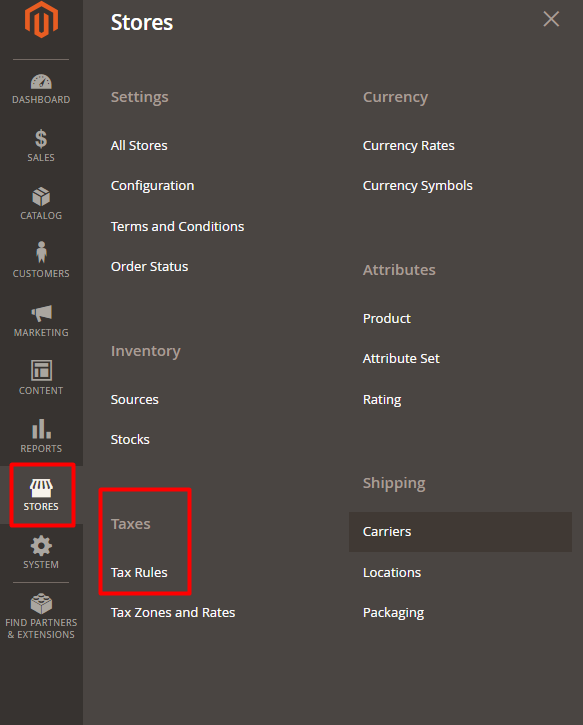
Click on “Add New Tax Rule” button


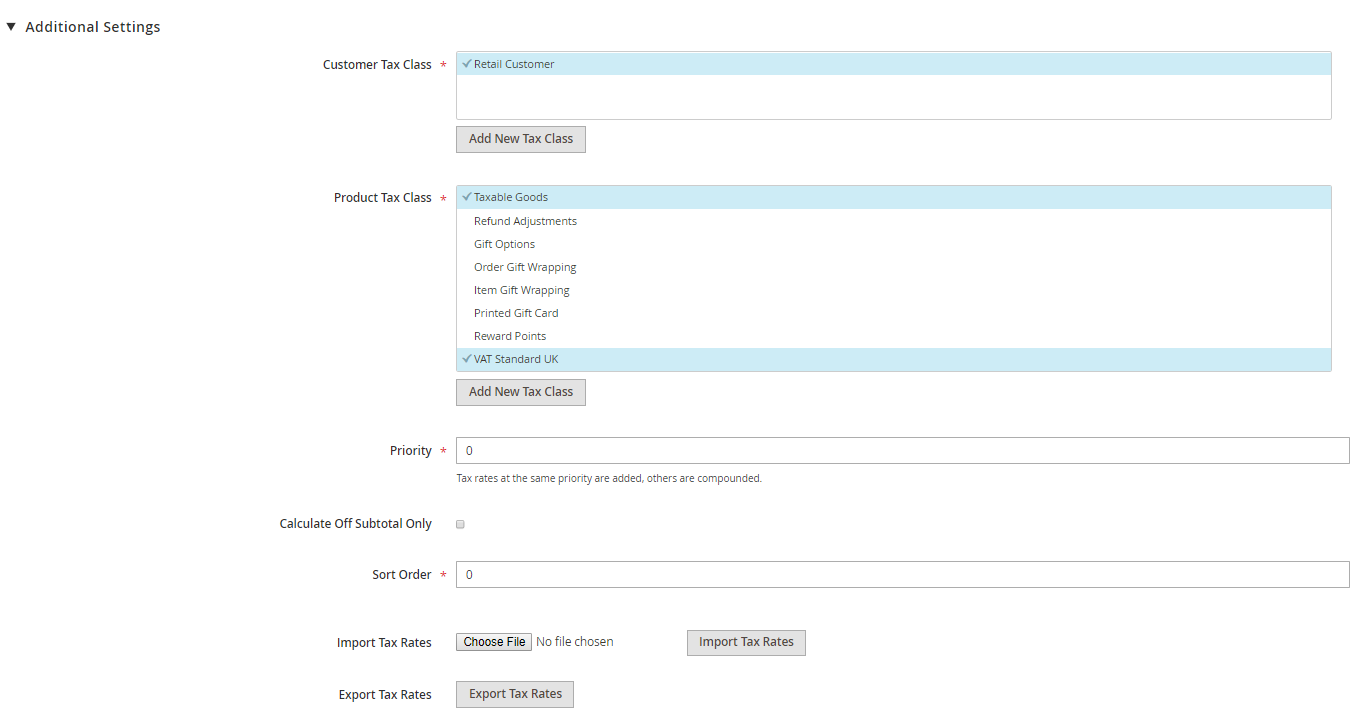
-
Step 6
Now you can go forward and apply the tax to the product.

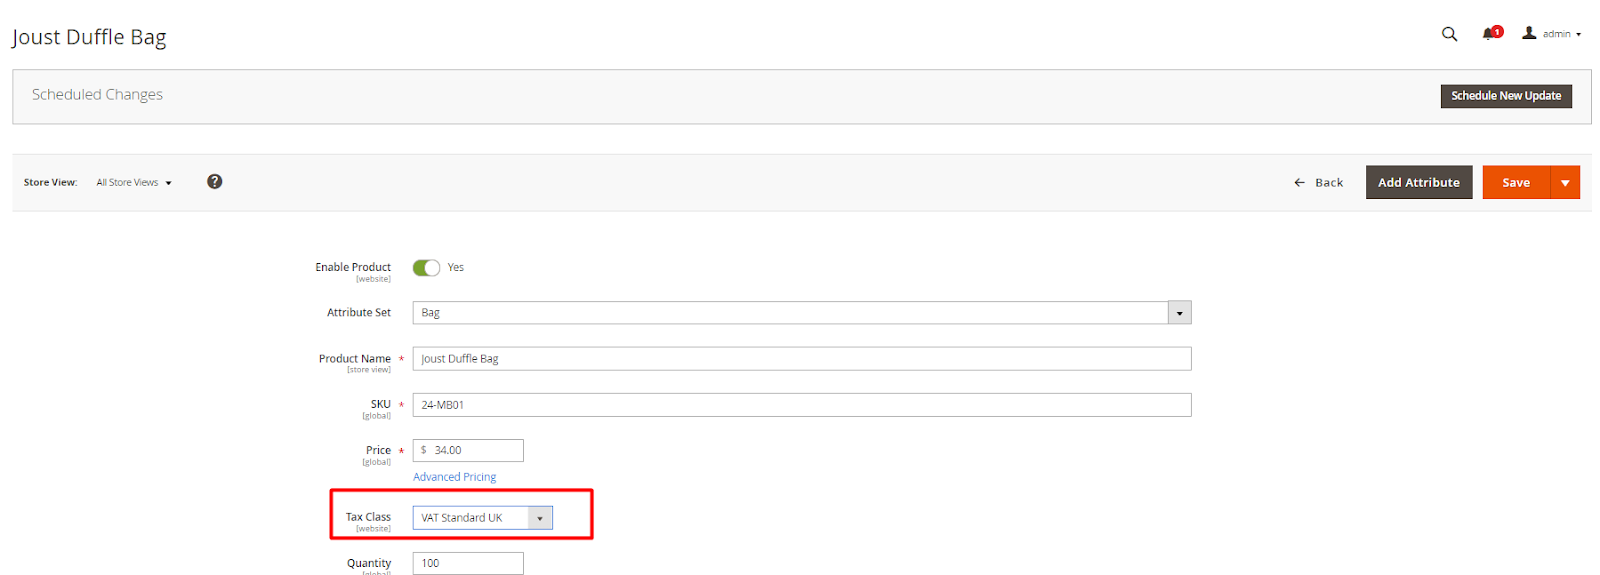
Press Save
Conclusion
Setting up the tax rules is not a complicated task but while using Magento, you must know about the technical know-how. We at MagnoStack are well versed with the techniques of setting up the tax rules in Magento.
The team is well updated with the tax rates levied by various nations and hence there is no space for mistakes left! So, contact us if you have any doubts related to the taxes on eCommerce, we will surely resolve every issue.
)
Get in touch with our expert developers & consultants
We'll get back to you within 24 hours
Talk to our expert
